In recent years we have been asked again and again how to mount a riflescope optimally. Don't worry, you don't have to go to a gunsmith for this. Here we explain how best to proceed in order to achieve a good result.
Especially with tutorials it is important that they are understandable and 100% correct at the end. For this reason we have got help for the topic: "AirBuddha" Björn supported us with his tips.
First step: positioning the scope on the air rifle

Choosing the right riflescope mount is a topic in itself – for today we assume that you have already decided on your riflescope and the appropriate mounts.
First of all we have to find out the correct eye relief. To do this, place your head comfortably on the cheek piece and hold the scope over the rifle. Then position the riflescope at the distance at which you can clearly see the picture in the scope and there is no black border in the picture itself. Then the riflescope is set to the correct distance. Remember this position or keep holding the scope in this position.
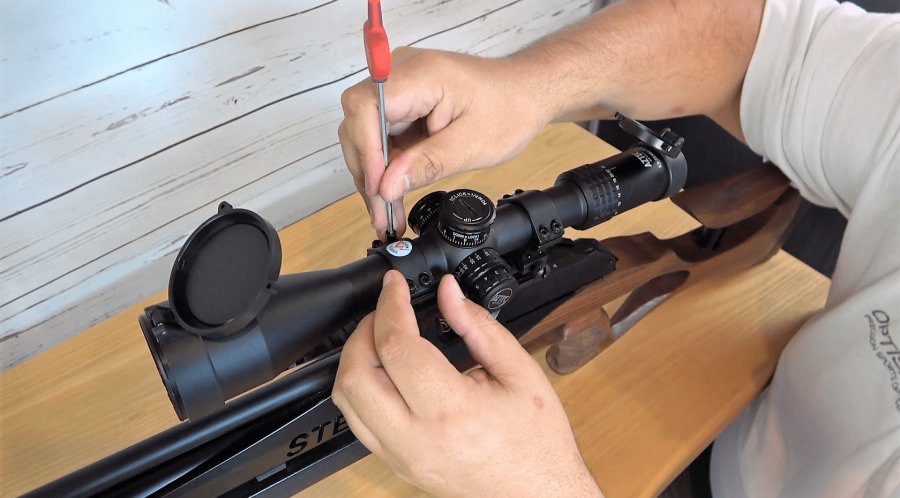
Now take the lower part of the one-piece or two-piece riflescope mount and place it on the 11-mm scope rail or Picatinny rail and place the riflescope on the mounts. For safety's sake, check once again at a glance whether the picture still fits. Then take the upper parts of the mounts and screw them on lightly
Second step: the reticle of the riflescope must be level
Next we have to make sure that the reticle is perfectly level. To do this, the vertical line in the reticle should be aligned with something that is 100% vertically straight.
If you don't find such a construction around you, you can hang a string with a weight on it on a hook. When it is suspended, gravity will show you the perfect vertical line.
Now take a spirit level and place it on your air rifle to make it perfectly straight. Once it is level, turn the scope until the vertical line of the reticle (crosshairs) is exactly above the plumb line.
Third step: fit the scope to the air rifle
Once you have done this, tighten the screws of the scope mount hand-tight. You can make sure that the distance between the upper and lower part of the mounts are the same on both sides of the riflescope. The function would also be there if this was not the case, but it simply looks better this way. Now tighten the screws alternately, up to an approximate torque of 5 to 8 Newton.
Fourth step: after mounting the riflescope, zero it in
You are already half way there! Now we just have to make sure that we can hit something with the setup.
It is recommended to fire the first shot at a target from a relatively short distance. If the riflescope is completely out of alignment, you won't miss completely the target but you'll still hit it somewhere. Then you can correct it in the right direction.
You can do this by using the elevation and windage turrets on your riflescope. Unfortunately, the adjustment does not work the same way for all riflescope manufacturers. This means that if you turn the elevation turret clockwise, some riflescopes will move the hit point downwards, others upwards. You can find out how to proceed in the user manual.
The alternative is to simply check it. Just make 10 clockwise clicks once and see where the hit point shifts. Once you've found that out, all you have to do from now on is turn in the right direction until you hit your target exactly.

If necessary: shoot a grouping

If you shoot an air rifle that recoils, it's not quite so easy. You really have to watch out where the hits go. It's incredibly difficult to always shoot into the same hole. If you shoot 10 rounds, for example, and the hit pattern (grouping) is completely on the upper right, then you carefully adjust the scope a little further down to the lower left and shoot the next test rounds again.
Here you have no other choice than to test this over a longer period of time. Unless you are such a good shooter that you can rely on the result being so representative right from the first shot.
There are also other ways of mounting and zeroing a rifle scope. But we have chosen the one described here.
There is even more on www.airghandi.de (German site).


